OP Desktop Client
With OP Desktop Client, the user connects to an OP server, which provides information on current user/computer print activities with Integrated Windows Authentication and Host Authentication. As such, it is no longer necessary to enter a name or password into your web browser every time.
Other Features:
• Control the current balance including
accepted and rejected print jobs
• Increase the balance through prepaid
payment cards
• Use secure SSL connections
• Multilingual support
OP Desktop Client Installation:
1. Download and run the latest
OP Desktop Client from
http://www/fitosoft.com/downloads
2.
Follow the installation instructions that appear on the screen
3.
OP Desktop Client will be installed on your computer
4. After the OP Client is set up, it will minimize
itself to the System Tray (the bottom-right corner of your screen). To open the
program again, click on the icon in the System Tray.

5. OP Desktop Client will start automatically once the installation is complete. If this is your first time running OP Desktop Client, the software will help you to get started by popping up the Add OP Server dialog.
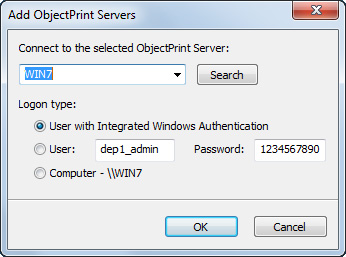
Server Name – Enter a name for the OP Server you are
connecting to.
Choose Logon type: User with Integrated Windows
Authentication, with user name and password and Computer (Host) Authentication.
Click "OK" when finished. The program will now test the
connection to the server.
If the connection is working, a success
message will appear.
If the connection is not working, an error message
will appear. You will need to go back and verify your settings.
 OP Desktop Client uses port 1563 (TCP). This
port must be accessible from the internet on the machine running
OP Desktop Client. OP Desktop Client uses port 1563 (TCP). This
port must be accessible from the internet on the machine running
OP Desktop Client.
Uninstall:
Open Add/Remove Programs and select
OP Desktop Client. Click on the Remove button or click the Start
button and select "All Programs"->"OP Desktop Client"->"Uninstall".
Using the OP Desktop Client
Main Screen Display:

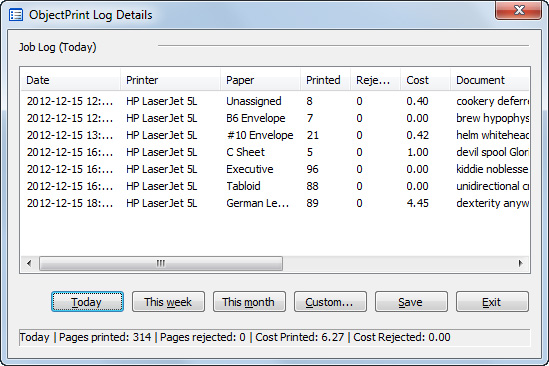
OP Desktop Client shows the name, status, balance, number of
pages printed/rejected, and the cost.
OP Client Commands
• Increase Balance –
Increase the balance for the current user or computer using a prepaid card code
• Settings - Change an existing OP Server and Logon type
•
Close - Hide OP Desktop Client in System Tray
• Refresh - Refresh the
current state of printing for a user or a computer
• History - Show detailed
information
To see the user/computer detailed log, click the "History"  button: button:
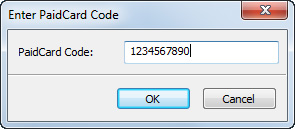
If you have a valid prepaid card, type your set number into the
space provided, select the appropriate account and OP Server and click on
the "OK" button to update.
If you wish to enable OP Desktop Client for this server,
check 'Enable OP Desktop Client' in General Settings.
Click 'Enable Prepaid cards' to enable prepaid cards.
|
